

Let’s take a look at moving Authentication to a small service using gRPC. We will interact with that service using a .Net Core 3.0 API and Postman.
I decided to break out this piece into three posts. The others are:
- Part 2 – Calling gRPC Microservices from .Net Core 3.0 Web Apis.
- Part 3 – Adding Asp.Net Identity to a .Net gRPC Service. (still to come)
The corresponding code for this post is located on GitHub.
Please note that the code demonstrated here is for illustration and learning, not production. I have not broken out code into separate classes much just to keep things as simple to follow as possible.
Let’s Get Started
Let’s start by creating a blank solution. We will add our projects to this solution.
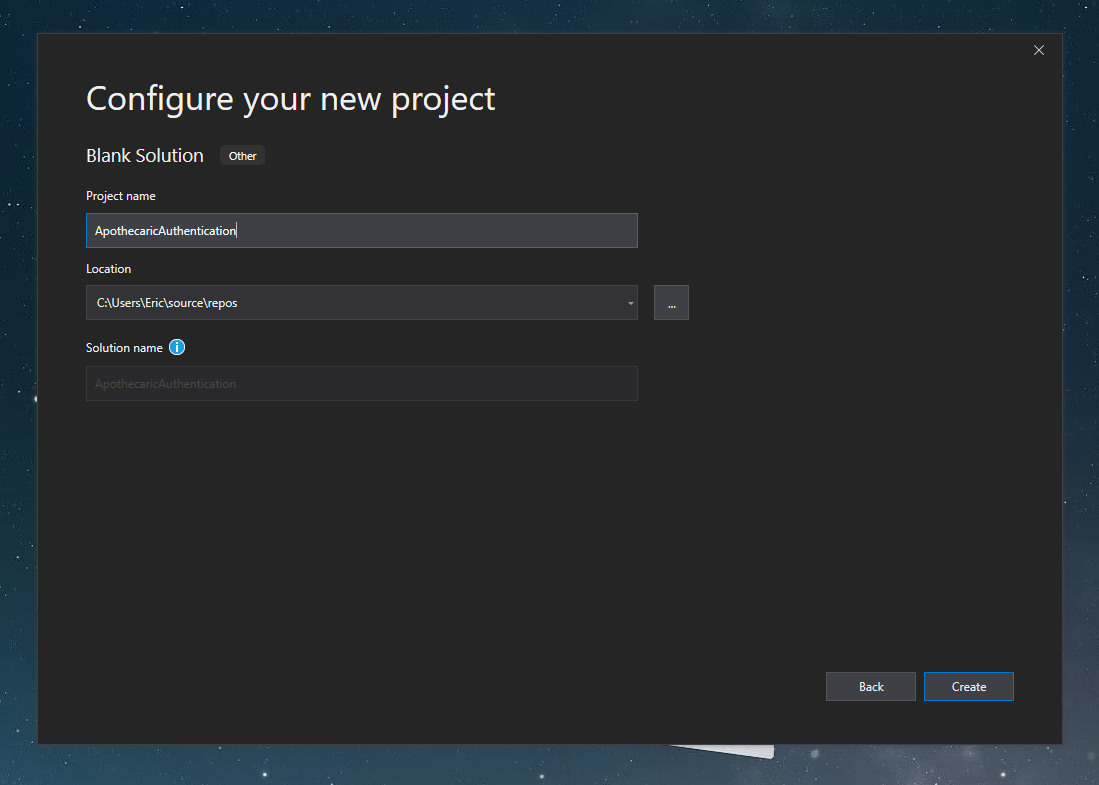
We can call this solution ApothecaricAuthentication.
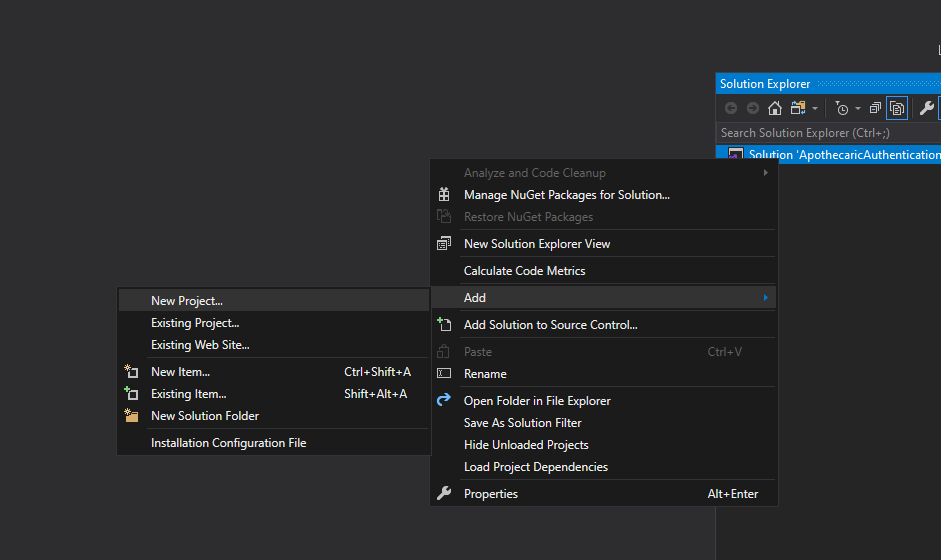
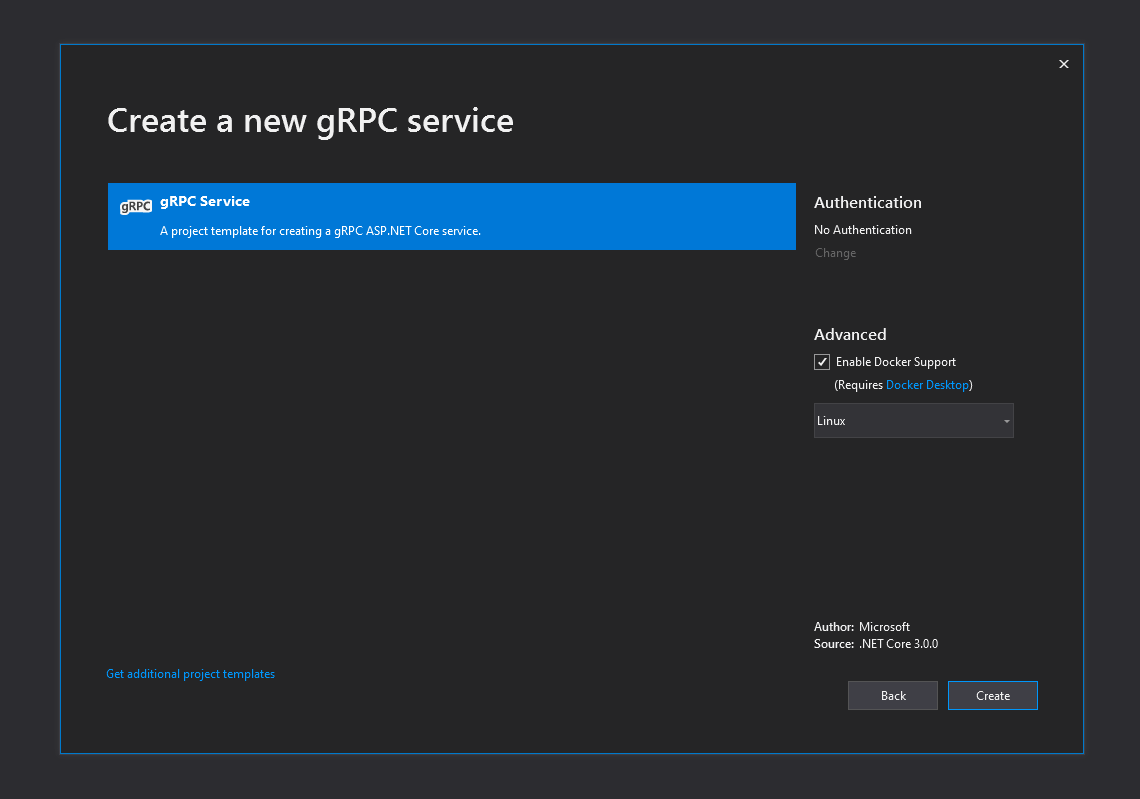
And now let’s create our gRPC project. Add New Project…
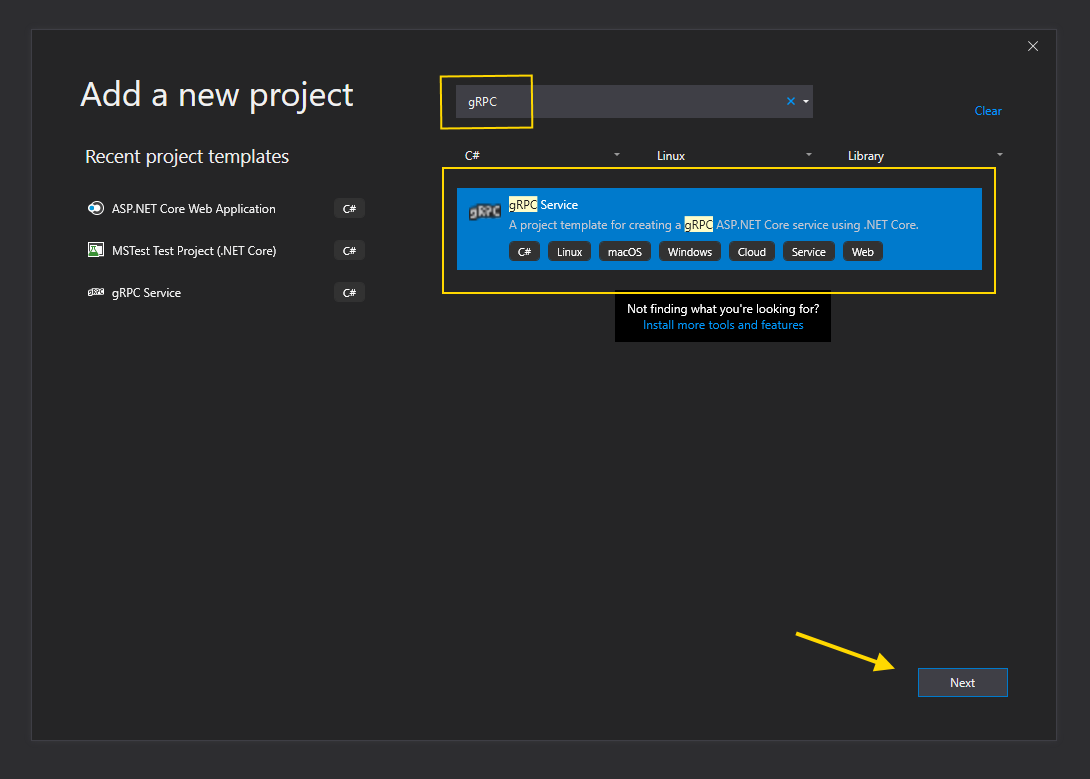
At the top of the Add a new project dialog, type in “gRPC” in the search and you should see the gRPC Service type project. Select that project type and choose Next.
I will the name my project “Apothecaric.Authentication.Service“.
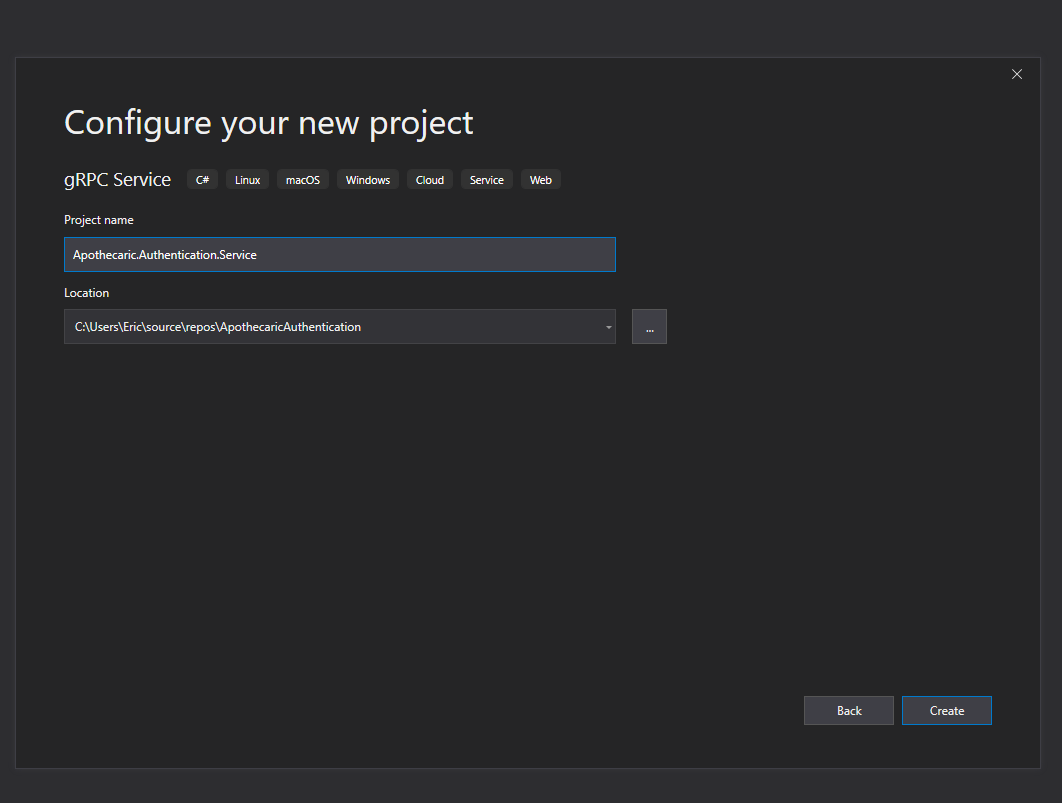
And here are the settings I chose for my gRPC Service project.
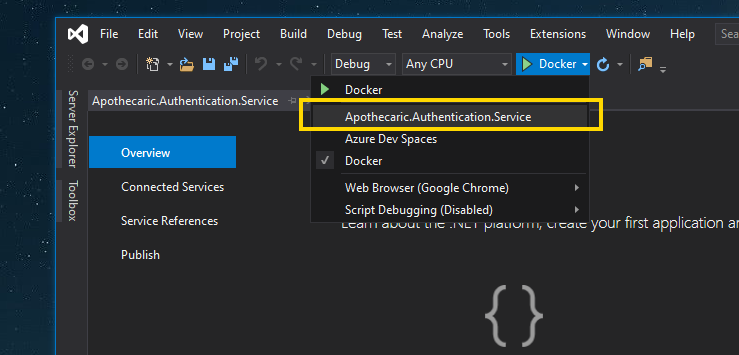
I usually will change the server that runs the project over to the Kestrel server. You can do this by choosing your full project’s name in the build/run dropdown.
Proto Files
At this point we will have to add a new proto file. The Proto file (otherwise known as a protobuf file) is a definition file for the methods and objects that will be used and exposed by our service.
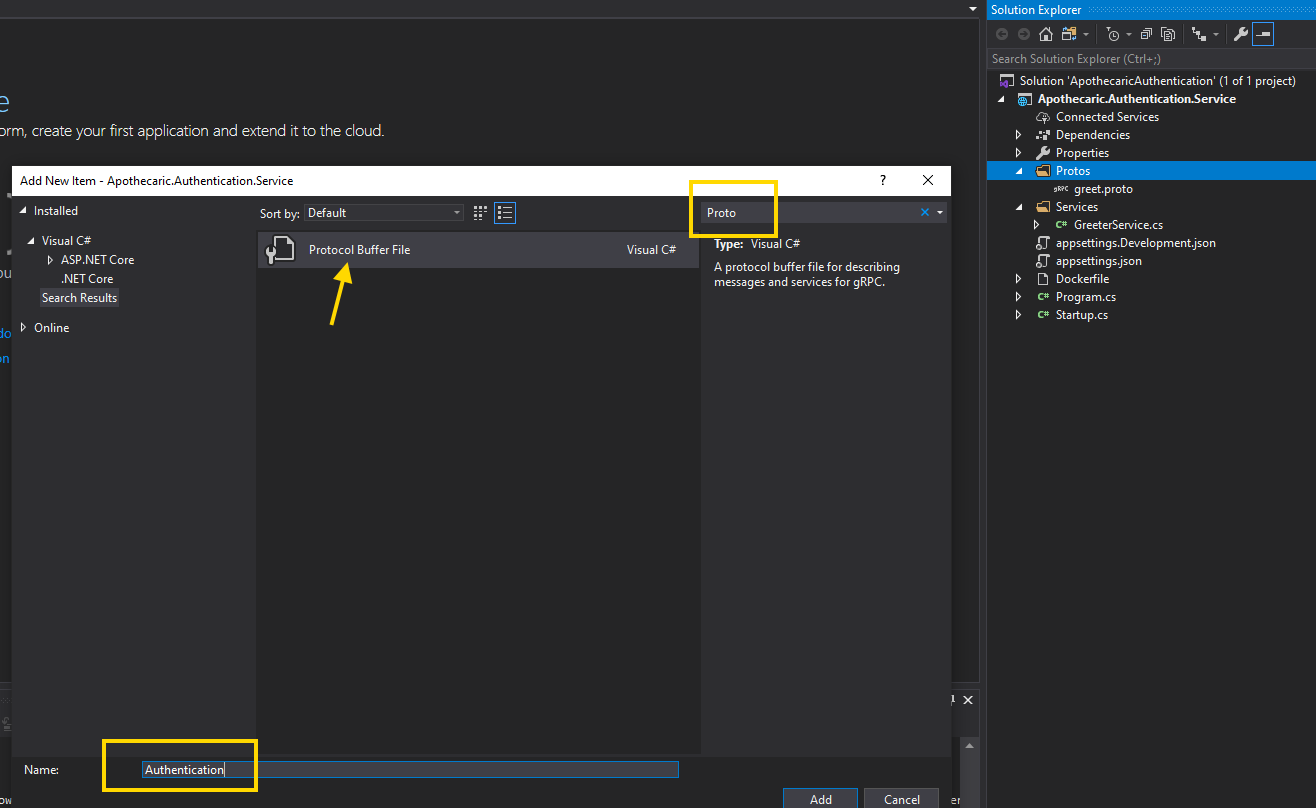
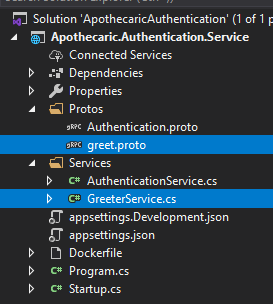
Start by selecting the project’s Protos folder and then right click and choose Add -> New Item… from the context menu.
The search for “Proto” in the upper right corner search box on the New Item dialog. The name for this type of file, in Visual Studio, is Protocol Buffer File.
I will name this file Authentication.proto.
The new Authentication.proto file will have the following code. Notice the namespace that Visual Studio has supplied us already. This will be used when our build creates the code based on this proto file (more on this code creation a bit later…).
1
2
3
syntax = "proto3";

option csharp_namespace = "Apothecaric.Authentication.Service.Protos";
We can now add our methods, objects, and package name to our proto file.
1
2
3
4
5
6
7
8
9
10
11
12
13
14
15
16
17
18
19
20
21
22
23
24
25
26
27
28
29
30
31
syntax = "proto3";

option csharp_namespace = "Apothecaric.Authentication.Service.Protos";

package Authenticate;

service Authentication {

	rpc CreateToken (LoginRequest) returns (AuthenticatedUserResponse);

	rpc RefreshToken (RefreshTokenRequest) returns (AuthenticatedUserResponse);
}

message LoginRequest {
	string email = 1;
	string password = 2;
}

message RefreshTokenRequest {
	string authToken = 1;
	string refreshToken = 2;
	string firstName = 3;
	string lastName = 4;
}

message AuthenticatedUserResponse {
	string authToken = 1;
	string refreshToken = 2;
	string firstName = 3;
	string lastName = 4;
}
If we take a look at our proto file, we have added the “package” name as Authenticate. Next is the definition of our service. Our service’s name is Authentication which includes two methods, CreateToken and RefreshToken.
1
2
3
4
5
6
7
8
package Authenticate;

service Authentication {

	rpc CreateToken (LoginRequest) returns (AuthenticatedUserResponse);

	rpc RefreshToken (RefreshTokenRequest) returns (AuthenticatedUserResponse);
}
The CreateToken method will handle our login. The method will authenticate our user and create a JWT token and return the JWT token, a Refresh Token, and a little user information.
The RefreshToken method will intake a Refresh Token, check the database to see if the refresh token is still valid, and if it is, we will issue a new JWT Token and return the JWT token, the same Refresh Token, and a little user information, much like the CreateToken method returned.
1
2
3
4
5
6
7
8
9
10
11
12
13
14
15
16
17
18
message LoginRequest {
	string email = 1;
	string password = 2;
}

message RefreshTokenRequest {
	string authToken = 1;
	string refreshToken = 2;
	string firstName = 3;
	string lastName = 4;
}

message AuthenticatedUserResponse {
	string authToken = 1;
	string refreshToken = 2;
	string firstName = 3;
	string lastName = 4;
}
The objects we have here are our two objects that we send into our methods (“request” objects) and the AuthenticatedUserResponse (“response” object) that gets returned from both of our methods.
Build Code Files
Now we want to build some code files, in C#, that will type our gRPC service.
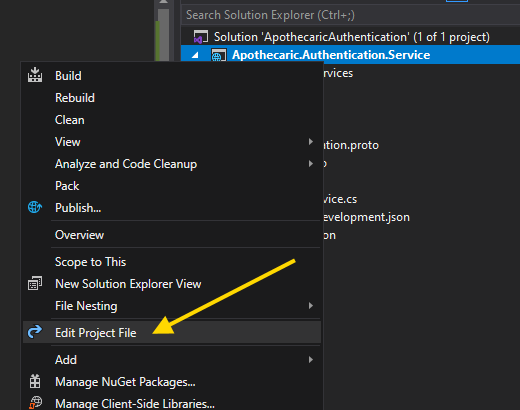
To accomplish the code creation, we need to edit the Project (csproj) file. If you have installed Productivity Power Tools, you can right click on the project name and select Edit Project File from the context menu.
We need to let the project know where our proto files are located so that when we build our project, the build process will also create the cs files we need to define our service. The build process will take the information from the proto file and create some C# code for us.
In the project (csproj) file, locate the ItemGroup for the greet.proto file.
1
2
3
<ItemGroup>
    <Protobuf Include="Protos\greet.proto" GrpcServices="Server" />
</ItemGroup>
And add in our Authentication.proto path.
1
<Protobuf Include="Protos\Authentication.proto" GrpcServices="Server" />
And let’s remove the greet.proto path from the project file. We won’t need that any longer. We will also delete the greet.proto file from the project, along with the GreeterService.cs file. These files come with the default project template from Visual Studio.
Your csproj file should now look similar to:
1
2
3
4
5
6
7
8
9
10
11
12
13
14
15
16
17
18
<Project Sdk="Microsoft.NET.Sdk.Web">

  <PropertyGroup>
    <TargetFramework>netcoreapp3.0</TargetFramework>
    <UserSecretsId>123456-1234-4321-1221-112233445566</UserSecretsId>
    <DockerDefaultTargetOS>Linux</DockerDefaultTargetOS>
  </PropertyGroup>

  <ItemGroup>
    <Protobuf Include="Protos\Authentication.proto" GrpcServices="Server" />
  </ItemGroup>

  <ItemGroup>
    <PackageReference Include="Grpc.AspNetCore" Version="2.23.1" />
    <PackageReference Include="Microsoft.VisualStudio.Azure.Containers.Tools.Targets" Version="1.9.5" />
  </ItemGroup>

</Project>
Another thing to note here, the GrpcServices="Server" part. This tells the build process to build the Server related cs files for us. Later, when we work on the Api project (the Client), we will change this to “Client” and the build process will create Client related cs files for us.
Template File Cleanup
Now is time to clean up the “Greet” files that the Visual Studio gRPC project template produced for us. Go ahead and delete the greet.proto and the GreeterService.cs files.
Before we build the project yet, we also need to remove a reference to the GreeterService object in the Start.cs file. Look at the Start.cs file, and if you have created the project from Visual Studio, you should see the now offending error on line 34.
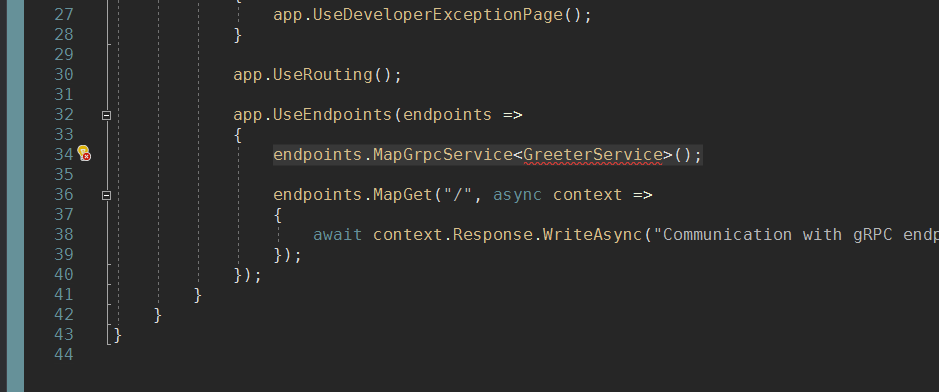
Look for…
1
endpoints.MapGrpcService<GreeterService>();
… and remove that line.
Build It!
You can now build your project and you should not see any errors. You should have also generated the needed Authentication files.
But Where??
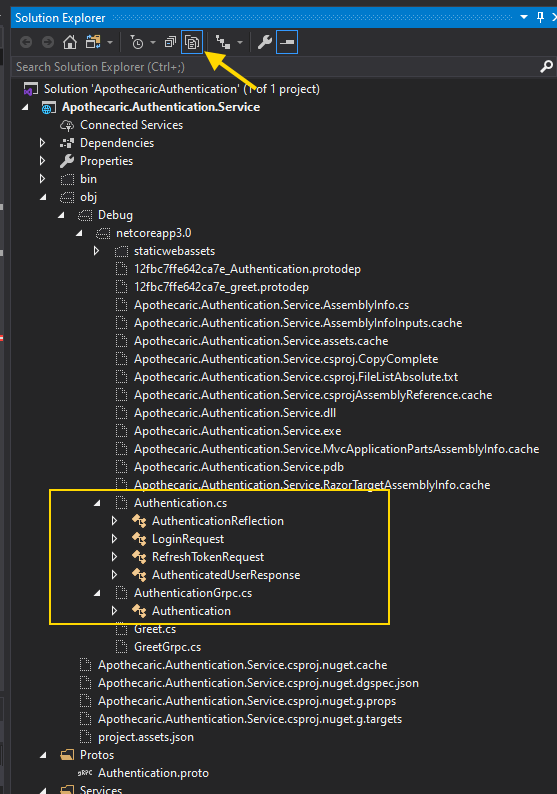
You won’t see the files that the build process has created for you unless you dig into the obj folder to take a look. Select the Show All Files icon in the Solution Explorer and look into obj -> Debug -> netcoreapp3.0 path. You will see your Authentication.cs file and an AuthenticationGrpc.cs file.
You can go take a look at these files if you would like.
Create The Service File
Now we need to create a Service file. Something for our client apps to call in to. This is much like the Controller in .Net Web Api’s.
Add a new class in the Services folder called “AuthenticationService”. In this new class, we need to inherit from our Authentication.cs file that was created for us. The class we need to inherit from is a base class, and that base class is named the same as the service name you gave in the proto file: service Authentication {.
Also, if you remember, we defined a namespace way back in our proto file: "Apothecaric.Authentication.Service.Protos".
Let’s use this information to inherit from the base class that we need. Your AuthenticationService.cs file should look something similar to this:
1
2
3
4
5
6
7
8
9
10
11
using System;
using System.Collections.Generic;
using System.Linq;
using System.Threading.Tasks;

namespace Apothecaric.Authentication.Service.Services
{
    public class AuthenticationService : Protos.Authentication.AuthenticationBase
    {
    }
}
The file that was created is using the Apothecaric.Authentication.Service.Protos namespace. That worked out pretty slick.
Put This Thing Into Override!…er…
In our new AuthentiationService class, we will now need to override our CreateToken method and our RefreshToken method. If you start to type “public override”, intellisense will show you these two methods to choose. Your AuthenticationService file should now look like this:
1
2
3
4
5
6
7
8
9
10
11
12
13
14
15
16
17
18
19
20
21
22
using System;
using System.Collections.Generic;
using System.Linq;
using System.Threading.Tasks;
using Apothecaric.Authentication.Service.Protos;
using Grpc.Core;

namespace Apothecaric.Authentication.Service.Services
{
    public class AuthenticationService : Protos.Authentication.AuthenticationBase
    {
        public override Task<AuthenticatedUserResponse> CreateToken(LoginRequest request, ServerCallContext context)
        {
            return base.CreateToken(request, context);
        }

        public override Task<AuthenticatedUserResponse> RefreshToken(RefreshTokenRequest request, ServerCallContext context)
        {
            return base.RefreshToken(request, context);
        }
    }
}
To test this new service out, let’s add some mocked data for the return and also make the methods async.
1
2
3
4
5
6
7
8
9
10
11
12
13
14
15
16
17
18
19
20
21
22
23
24
public class AuthenticationService : Protos.Authentication.AuthenticationBase
{
    public override async Task<AuthenticatedUserResponse> CreateToken(LoginRequest request, ServerCallContext context)
    {
        return await Task.FromResult(new AuthenticatedUserResponse
        {
            AuthToken = "12345678987654321",
            RefreshToken = "222333444555",
            FirstName = "Eric",
            LastName = "Smasal"
        });
    }

    public override async Task<AuthenticatedUserResponse> RefreshToken(RefreshTokenRequest request, ServerCallContext context)
    {
        return await Task.FromResult(new AuthenticatedUserResponse
        {
            AuthToken = "98765432123456789",
            RefreshToken = "555444333222",
            FirstName = "Eric",
            LastName = "Smasal"
        });
    }
}
One Last Step
One last thing to do here is register our AuthenticationService class in the Startup.cs file. So we need to put something in the spot where we removed the GreeterService earlier. Take a look at the code here and I have put our registration on line 22 (endpoints.MapGrpcService<AuthenticationService>();). Here is where you would register any new Service classes that you might create.
1
2
3
4
5
6
7
8
9
10
11
12
13
14
15
16
17
18
19
20
21
22
23
24
25
26
27
28
29
30
public class Startup
{
    // This method gets called by the runtime. Use this method to add services to the container.
    // For more information on how to configure your application, visit https://go.microsoft.com/fwlink/?LinkID=398940
    public void ConfigureServices(IServiceCollection services)
    {
        services.AddGrpc();
    }

    // This method gets called by the runtime. Use this method to configure the HTTP request pipeline.
    public void Configure(IApplicationBuilder app, IWebHostEnvironment env)
    {
        if (env.IsDevelopment())
        {
            app.UseDeveloperExceptionPage();
        }

        app.UseRouting();

        app.UseEndpoints(endpoints =>
        {
            endpoints.MapGrpcService<AuthenticationService>();

            endpoints.MapGet("/", async context =>
            {
                await context.Response.WriteAsync("Communication with gRPC endpoints must be made through a gRPC client. To learn how to create a client, visit: https://go.microsoft.com/fwlink/?linkid=2086909");
            });
        });
    }
}
Your project should now build. I have not found a good tool to test gRPC Service applications on Windows yet. If anyone knows of a good tool for this, please pass that along!
We will test out the service by calling it from a REST Api that we will create in the next article. Stay tuned…..
Hope to see you then!